MediaCP Manual
    1. Getting Started
    2. Sales Questions
    3. Frequently Asked Questions
    4. Transcoder System Benchmarks
    5. Start your own streaming platform
    1. Change account currency
    2. Product Licensing
    1. Introduction
    2. Installation & Upgrade
      1. System Requirements
      2. Versions & Releases
      3. Installation
      4. Upgrading
      5. Streaming Servers
        1. Nginx-Rtmp Video Server
        2. Flussonic Media Server
        3. Icecast 2 / Icecast KH
        4. Video Feature Comparison
        5. Wowza Streaming Engine
      6. SSL Certificates
    3. Billing Integration
      1. WHMCS Integration Guide
      2. Clientexec Integration Guide
      3. Blesta Integration Guide
    4. Migrate from other software
      1. Migrate from Centovacast
    5. Backup & Restoration
      1. Backup MediaCP
      2. Restore MediaCP
      3. Transfer to another server
    6. Administration
      1. Custom Web Service Configurations
      2. Reset Admin Password
      3. Port 80 / 443 Proxy
      4. MediaCP System Commands
      5. Change MediaCP domain name
      6. Move media to another hard disk
      7. Secure your server
      8. Troubleshooting Login Errors
      9. Custom Facebook App
    7. Scaling
      1. Scale with Wowza and CloudFront CDN
      2. Nginx-Rtmp with CloudFront CDN
    8. Troubleshooting
      1. Grant access to support team
      2. Troubleshooting Wowza Streaming Engine
      3. FTP Troubleshooting
      4. MySQL Database Troubleshooting
      5. Reporting Troubleshooting
      6. Troubleshooting Liquidsoap AutoDJ
      7. Video Relay Troubleshooting
    1. Introduction
    2. Administrators Dashboard
    3. System Configuration
      1. General
      2. Services
      3. Video Players
      4. Albums
      5. Email
      6. Plugins
      7. Statistics
      8. Backups
      9. Custom HTML
      10. Misc
    4. Customer Accounts
      1. Managing existing Customers
      2. Create a new Customer
      3. Deleting a Customer
      4. Login as another Customer
      5. Send email to Customer
      6. Reset Customer Password
    5. Reseller Accounts
      1. Reseller Plans
      2. Create a Reseller Account
    6. Media Services
      1. Creating a Media Service
      2. Deleting a Media Service
    7. Announcements
      1. Managing Announcements
      2. Creating Announcement
      3. Deleting Announcement
    8. Statistics
    9. Software Health
    10. Software Updates
    11. Email Templates
    12. API
    1. API Documentation
    2. Custom Domain Names
    3. Shoutcast 2 Admin Guide
    4. Wowza and Flussonic on same system
    5. Submit a feature request
    6. Wowza Custom Properties
    1. Shoutcast 2 Live Broadcasting
    2. DJ Priorities
    3. HTML5 Audio Player
    4. Broadcasting with AutoDJ
    5. Shoutcast 2 Premium
    6. Mount Points
    1. Getting started with video streaming
    2. Live Streaming Overview
    3. TV Station Overview
    4. Ondemand Video Streaming
    5. Relay & IP Camera
    6. Connecting your encoder
    7. Managing your media files
    8. Embedding player on your website
    9. Video Transcoding (Adaptive Bitrate Streaming)
    10. Image Logo or Watermark Overlay on Video Stream
    11. nDVR Live Streaming
    12. Shoutcast 2 Stream Publishing
    13. Facebook Live Streaming
    14. Youtube Stream Publishing
    15. Icecast Stream Publishing
    16. Twitch Stream Publishing
    17. Periscope Stream Publishing
Managing your media files

Last updated 8 months ago

In this section you will learn how to prepare and upload video files to the Media Control Panel.

Preparing your media files
Before uploading your video files, it is highly recommended to transcode them to ensure a consistent transition between video files

For most users, it is important to ensure the encoded videos are capped to a maximum bitrate.

We recommend transcoding all files with HandBrake.fr video transcoder before you upload your files.
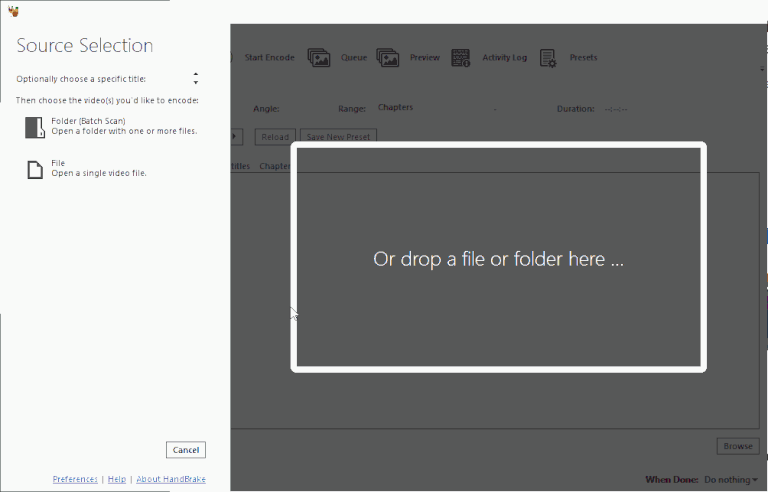
Step 1 - Select your Media Files

Step 1

Open HandBrake and select your media files
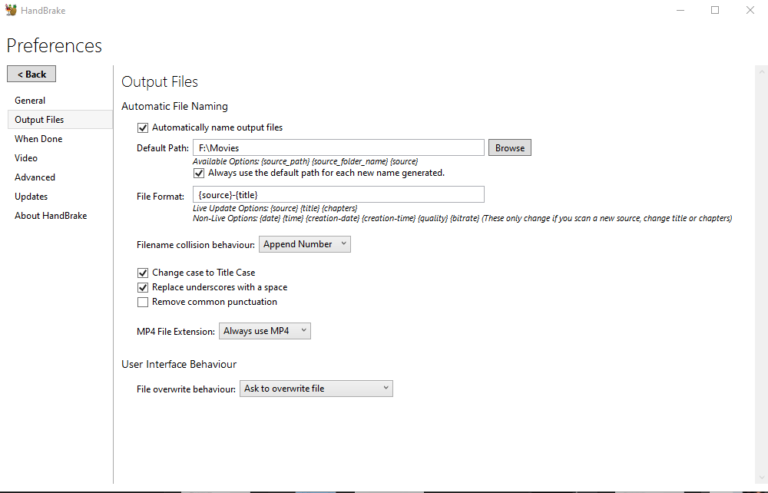
Step 2 - Set Default Path and .mp4 file extension

Step 2

Select Tools -> Preferences and set:

MP4 File Extension: Always use MP4

Also set your Default output path
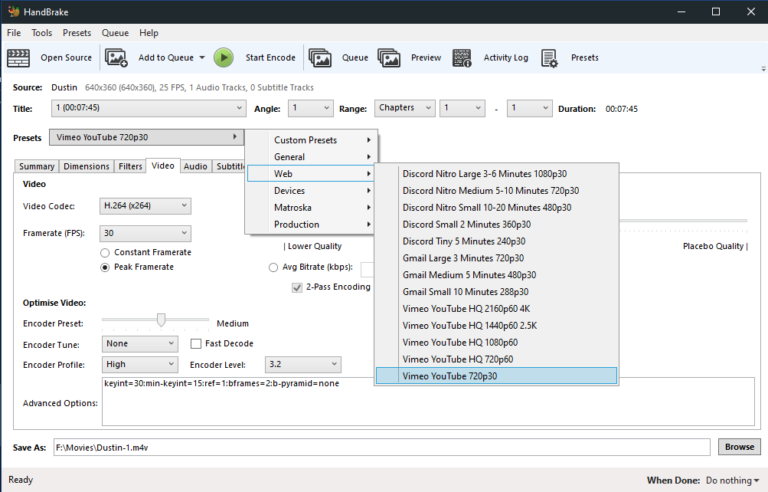
Step 3 - Select Preset

Step 3

We recommend a Preset of either:
Vimeo Youtube 720p
Video Youtube HQ 1080p
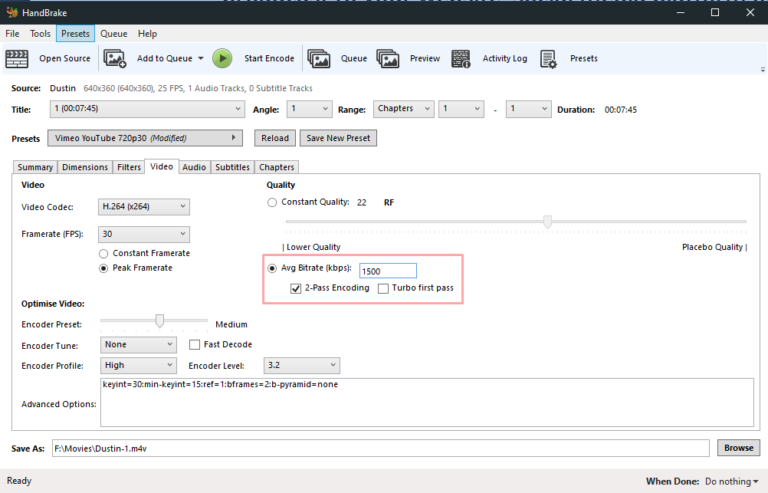
Step 4 - Set Avg Bitrate

Step 4

Setting a bitrate is important to ensure your TV Station does not exceed the bitrate limit.

It is normal for the encoding bitrate to fluctuate about 10% so make sure to set the Avg Bitrate lower than your limit.

Step 5 - Set Output

Step 5

Press Browse and then set the path where you want your transcoded files to be saved.
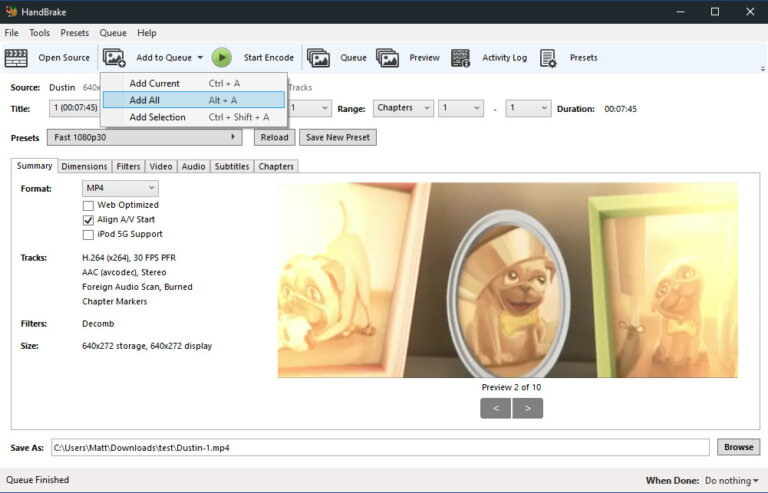
Step 6 - Add to Queue & Encode

Step 6

Select Add to Queue -> Add All

Press Start Encode

Uploading your media files
Once your video files have finished encoding you can upload them to the File Manager
Navigate to the File Manager

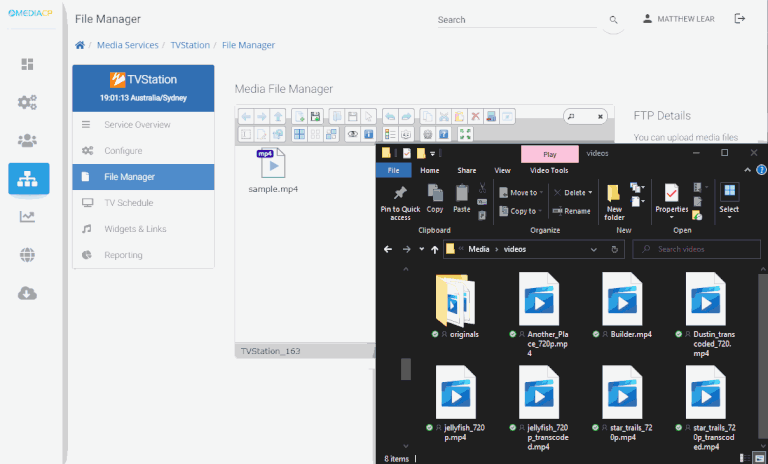
Drag and drop the media files from your PC to the Media File Manager

Upcoming: Understanding Playlists

Learn how to manage your TV Stations playlists.

Table of Contents